Creating an event
To create an event:
- Start creating a new topic or edit the first post of an existing topic.
- Add your location and any other instructions you have for the event. There’s no special field for location, so add it in the body of your post.
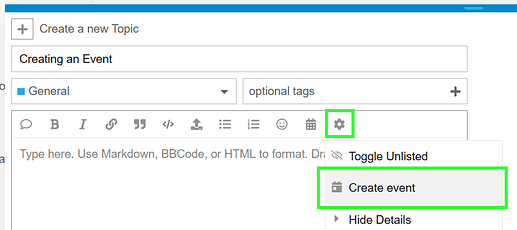
- Click the gear icon in the toolbar.
- Select “Create Event” from the dropdown menu.
- Once you click Create, it will add some code to your post. You can continue to add information before or after. You can see the preview to your right if you’re on desktop, or if you’d like to preview on mobile, click the small icon of the computer monitor in the lower right corner of the screen.
- Click “Create Topic” when you’re all done.
Event options
When creating an event, you can set various options:
- Start and end dates and times: An event must have a start date; end date is optional
- Event name: Optional; defaults to the topic title if not specified
- URL: Add a link to display in the event information
- Timezone: Set the timezone (note that the time in markdown is UTC)
- Status: Choose from:
- Public: Joinable by anyone
- Private: Invite-only
- Standalone: Not joinable
- Reminders: Set optional reminders to notify participants or bump the topic
- Recurrence: Set if this is a recurring event
- Minimal Event: Hide the ‘Going/Not Going’ and invitee status in the display
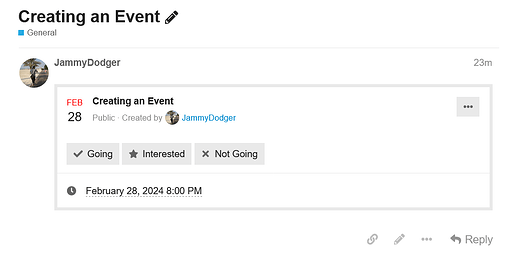
After setting these options, your event topic will look similar to this:
More detailed instructions here.
Community Calendar
Once you’ve created your event you should see it in the Community Calendar. You’re all done!
Editing Your Event
If you need to change date/time or other information, you have two options. You can edit the code that was put into your post, or you can delete what is there and re-add it. If you’re not comfortable editing the code we recommend just deleting and re-adding.